


How to Stencil With a Foam Roller Without Paint Bleed
Paint bleed is the most common stenciling issue. It occurs when paint slips beneath the stencil template and blurs the stenciled design. The good news: Paint bleed is a preventable nuisance. In this How to Stencil post, we will share with you the best stenciling tips and tricks for avoiding paint bleed when stenciling with a foam roller. Scroll to the bottom to watch our How to Stencil With a Foam Roller video tutorial.
What causes paint bleed when stenciling?
The most common cause of paint bleed is stenciling with too much paint. Stenciling is not the same as painting. Unlike painting, you only need a minimal amount of paint to stencil. Stenciling with too much paint will flood the stencil template and cause paint to slip beneath the stencil cutouts. To avoid paint bleed, stencil with the proper "dry brush/roller" stenciling technique. We will explain this stenciling technique in detail below.
Other causes of paint bleed are: stenciling on a rough surface, stenciling on an uneven surface or the stencil template peeling off of the surface you are stenciling on. To avoid these issues, make sure to clean the surface you are stenciling on before you stencil and use Repositionable Spray Adhesive and painter's tape to secure the stencil to the surface you are painting. If you are stenciling on a rough surface, see our post on How to Stencil on a Rough Surface.
How to Stencil with a Foam Roller
First, lets talk about stenciling supplies. We highly recommend you stencil with a high density foam roller. A high density foam roller is best for stenciling because it absorbs less paint than a regular paint roller and is less likely to cause paint bleed when you stencil.
Your Stenciling Supplies
- High Density Foam Roller
- Repositionable Spray Adhesive
- Frog Painter's Tape
- A Stencil Template (we used our Philodendron Wall Painting Stencil Template for this stenciling tutorial).
- Acrylic Paint (or visit your local paint store).
- Paint Roller Tray
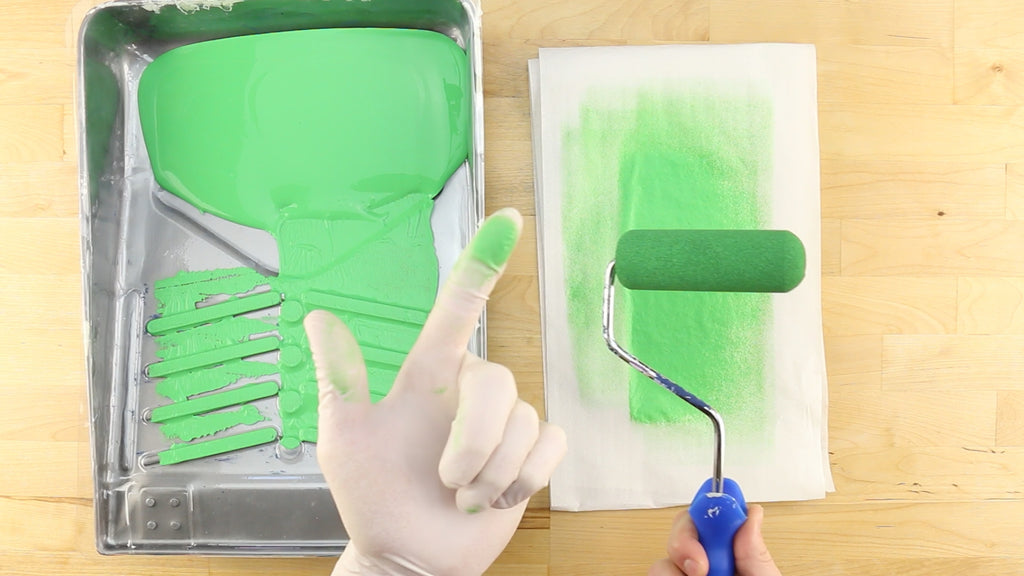
The most important step to preventing paint bleed is rolling excess paint off the roller onto a piece of paper towel. Evenly coat your foam roller in latex wall paint before rolling the excess off in the tray. Continue to roll paint off onto a piece of paper towel. Use a finger to test the paint on the roller to see if it smudges. If the roller feels sopping wet, continue rolling paint off until it no longer smudges on your finger. Once the roller no longer feels wet, but not quite dry, you are ready to stencil.

Next prepare your stencil using Stencilease Repositionable Spray Adhesive on the back of the stencil. Wait 30 seconds for the spray to become tacky then press it into position on your wall. Use a piece of Frog Tape painter's tape along the top of the stencil to secure its position. Place small pieces of painters tape beneath each of the 4 registration marks in the corners of the stencil before pressing the stencil flat.
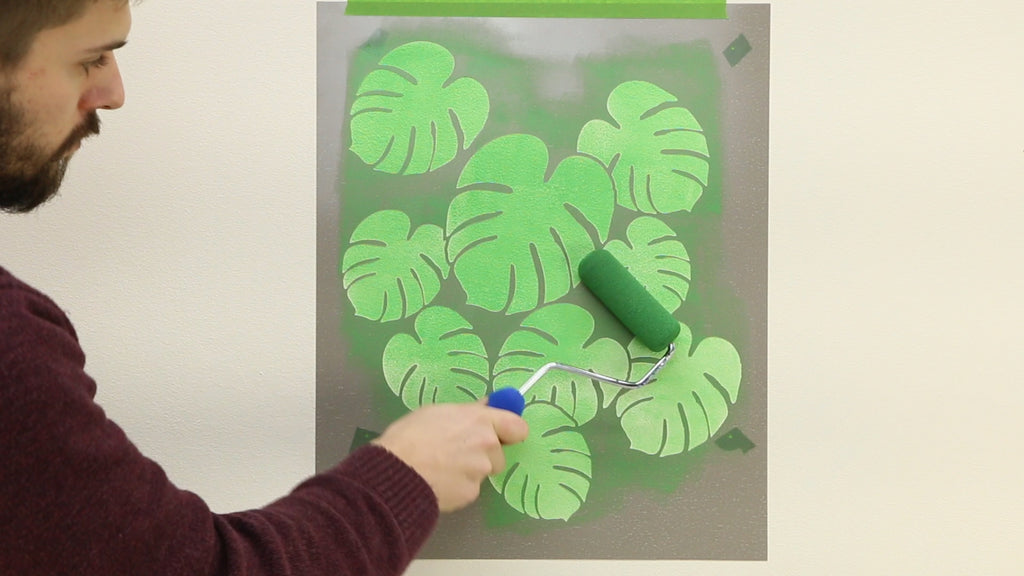
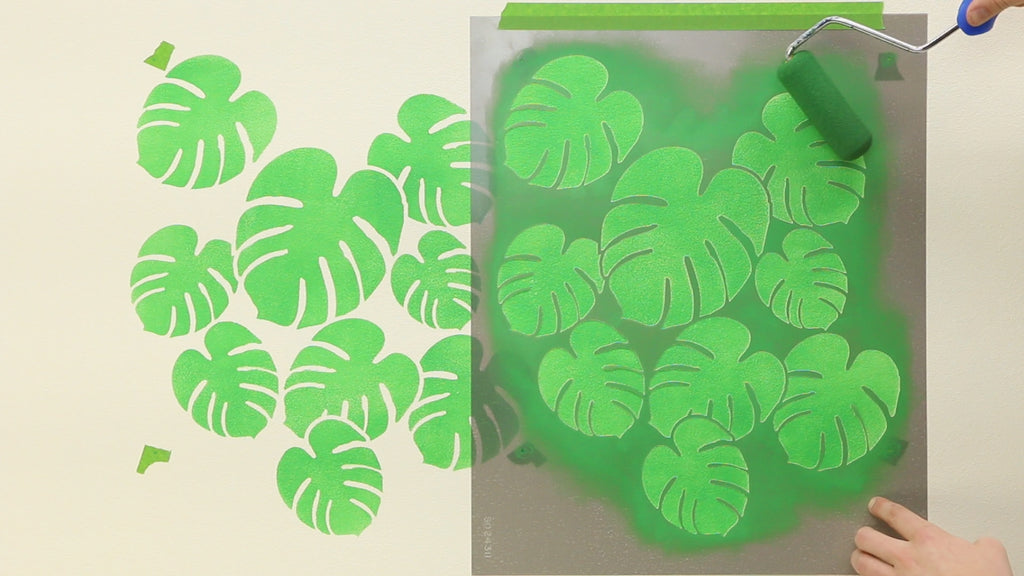
With the stencil in position you are ready to begin rolling paint onto the wall. Start by applying very light pressure as you gently roll the foam roller through the stencil. The paint should build in light coats and should not be fully saturating the design after one roll. This ensures paint bleed does not seep beneath the edges of the stencil design.
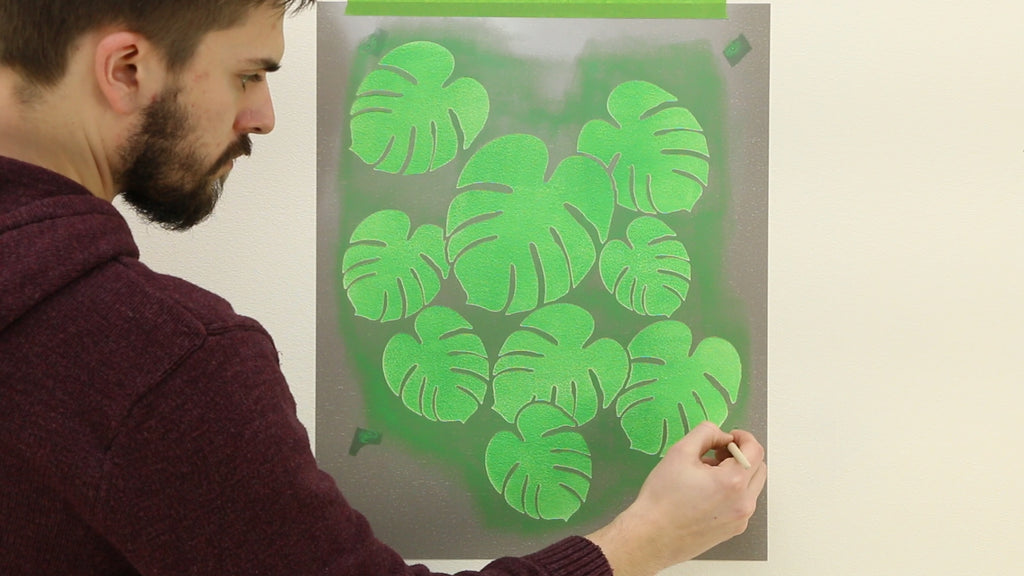
As multiple coats of paint build up the color of the design you may need to gently apply more pressure to fill in the edges. Be careful as you apply more pressure as this can lead to paint bleed if it gets forced beneath the edges. When the leaves are fully painted, use a stencil brush to swirl paint through the registration marks. Gently peel the stencil off the wall to reveal the pattern below. If you need to touch up the design you can put the stencil back in place by lining up the registration marks.
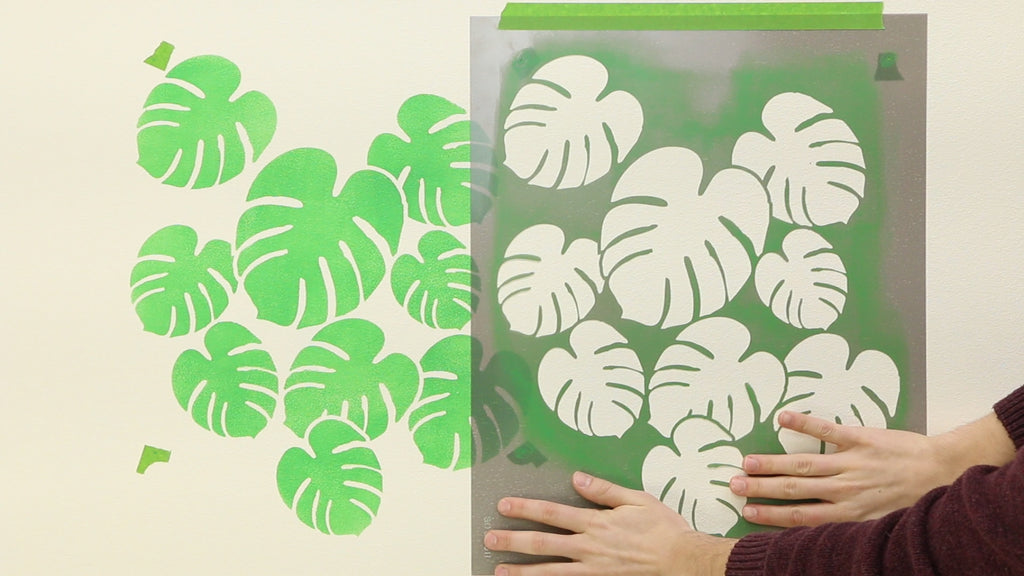
After the first repeat, line the stencil's registration marks up beside the freshly painted design before pressing the stencil flat to the wall. Add two additional pieces of Frog Tape painter's tape beneath the next set of registration marks. Continue rolling paint through the stencil just as before until the color matches. Simply peel and repeat!
As you continue these steps to repeat the design, you may find that paint no longer builds readily on your surface. Repeat the steps of loading your roller and rolling excess paint onto paper towel before you continue stenciling. Be sure to stencil with light pressure on the roller before getting into a rhythm. If you find there is too much paint on the roller, roll additional paint off onto paper towel until it feels just about dry to the touch.
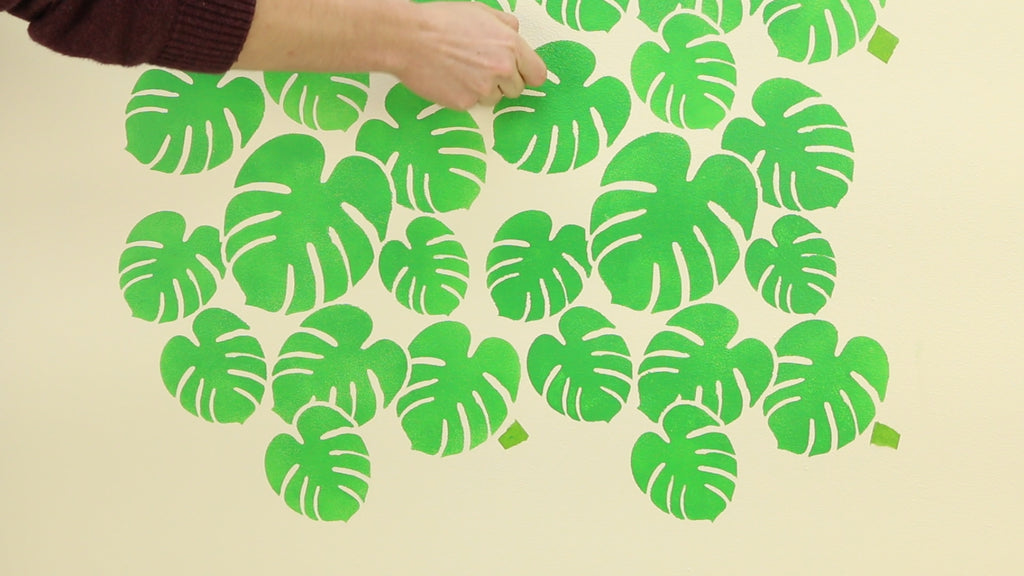
Once you have stenciled an accent or your entire wall, remove the Frog Tape painter's tape registration marks from your freshly painted wall. Check out the video and the links below for the tools and supplies used in this tutorial.
Watch our How to Stencil with a Paint Roller without Paint Bleed Video Tutorial:
Learn more about how to stencil your home and create beautiful home décor in whatever style you like. Visit our Stenciling Blog, or Video Gallery for how to stencil tutorials and projects tips. Browse our home décor stenciling projects Photo Gallery for ideas and inspiration on how to use stencil templates to decorate your home.
Shop our beautiful selection of DIY home décor stencil templates today!