


How to Upcycle a Serving Tray | Tropical Stenciled Serving Tray Project | Oak Lane Studio
Heat up your next gathering with this Stenciled Tropical Serving Tray Project from Oak Lane Studio.
Here's what you'll need:

- Philodendron Wall Stencil
- Americana Acrylic Paint
- Leaf Green
- Baby Pink
- Avocado
- White
- Royal Fuchsia
- Repositionable Spray Adhesive
- Americana Matte Finish Acrylic Sealer
- Double-ended Stencil Brush
- Frog Tape
- Old Wooden Serving Tray


First, give an old wooden tray a makeover with a base coat of Americana White Acrylic Paint.
Next, use Frog Tape to mask the sides and protect them from wayward brush strokes.


Use a paper plate to mix equal amounts of Baby Pink and Royal Fuchsia.
Use multiple coats to paint the bottom of your tray.


Now, cut a piece of paper the same dimensions as the tray bottom and position your stencil over it exactly how you'll want the pattern to go.
Use a marker to trace the edges of the paper on the stencil.
Use scizzors to cut the stencil, making sure to keep track of any sections that become separated from the main stencil.
Check for fit and trim and areas that are preventing the stencil from laying flat.


On a protected surface, and in a well-ventilated area, turn all pieces of the stencil over and spray with Repositionable Spray Adhesive.
After thirty seconds or so, place the stencil back inside the tray, tacky side down.
Press all areas of the stencil down to ensure good adhesion.
Do the same with any loose pieces.


Pour out some Leaf Green and thoroughly soak the bristles of a clean stencil brush.
Remove excess paint using the edge of the plate and also by swirling the brush on a stack of paper towels.
Too much paint on the bristles will result in paint bleeding underneath the stencil.
Apply the color with numerous light coats using the same swirling motion.
Before painting close to the edge, use pieces of Frog Tape to protect any areas where the green should not accidentally be painted.
Continue stenciling.


Once finished with the Leaf Green, take a small craft brush and some Avocado and paint a line down the center of each leaf.
Then, pull the brush in one direction away from the line dragging the paint out.
Wipe the paint off the brush using the paper towel, then pull the paint one more time away from the center.
This will create a fading effect, simulating a "shadow" and giving the leaf some depth.
Repeat this step for all leaves.
Switch back to Leaf Green and, using the craft brush, fill in any gaps between the leaves and the white frame.
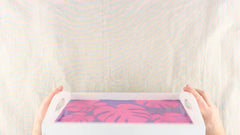
Once completed, carefully remove the tape and the stencil to reveal your stylish new serving tray!


To protect your tray from water damage, add a couple coats of Americana Acrylic Sealer.

For more tips and ideas, visit OakLaneStudio.com today.