


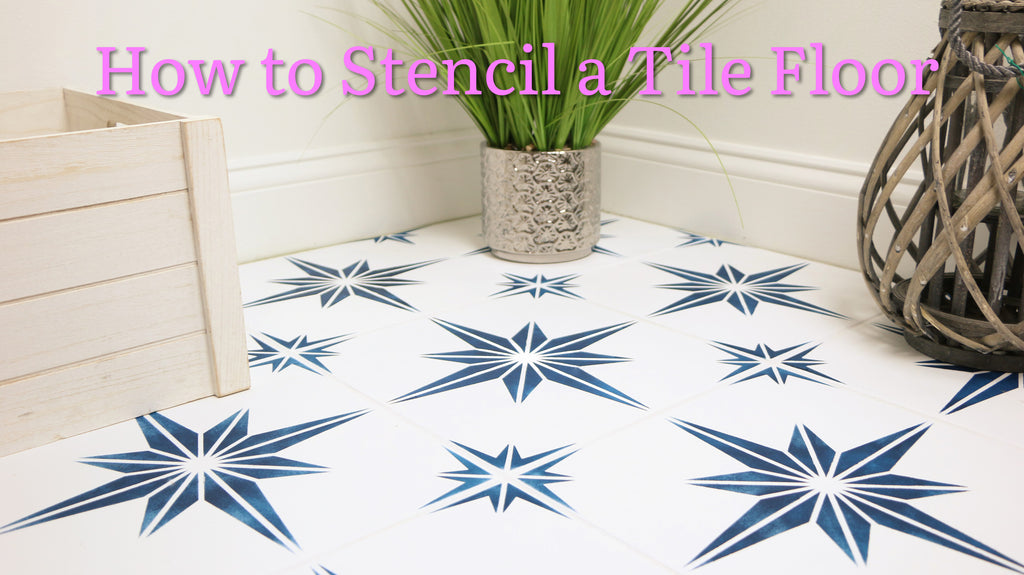

How to Stencil a Tile Floor
Stenciling a tile floor can be a creative and cost-effective way to update the look of your flooring. Here's a step-by-step guide on how to stencil a tile floor:

- Gather your materials:
- Monarch Stars Tile Stencil
- Americana Acrylic Paint in Navy Blue
- High Density Foam Rollers
- Repositionable Spray Adhesive
- Frog Tape Painter's Tape
- Paint Tray
- Primer / paint for base color
- Heavy duty cleaning solution
- Paper towels
- Brush-on Gloss Acrylic Sealer

- Prepare the floor:
- Clean the tile floor thoroughly to remove any dirt, grease, or debris. Use a suitable cleaner and allow the floor to dry completely.
- If there are any loose or damaged tiles, repair or replace them before starting the stenciling process.

- Plan your design:
- Decide on the stencil pattern and layout you want for your floor. Measure the floor area and determine how many stencils you'll need to cover the space.

- Secure the stencil:
- Position the stencil on the tile floor using painter's tape to hold it in place. Make sure it is aligned properly and lies flat without any wrinkles or bubbles.
- If the stencil doesn't have adhesive backing, you can apply stencil adhesive or spray adhesive lightly on the back to ensure it stays in place during painting.

- Apply the paint:
- Pour a small amount of tile stencil paint into a paint tray or palette.
- Dip your paintbrush or foam roller into the paint, then remove any excess paint on a paper towel or rag. This will prevent the paint from bleeding under the stencil.
- Begin painting within the stencil, using light to medium pressure. Start from the edges and work your way toward the center, filling in the design evenly.
- If you're using multiple colors, clean the stencil between colors to prevent mixing.

- Remove the stencil:
- Carefully peel off the stencil while the paint is still wet. Start from one corner and slowly lift it up, ensuring you don't smudge the design.
- Allow the painted tile to dry completely before moving on to the next stencil or applying additional coats of paint.

- Repeat the process:
- Repeat the stencil application and painting process for the remaining tiles, aligning the stencil with the completed designs to create a cohesive pattern.
- Make sure to clean the stencil between uses to maintain clean lines and avoid paint smudging.

- Touch up and seal:
- Once the painted tiles are fully dry, inspect the design for any touch-ups or imperfections. Use a small brush to fix any areas that need additional paint or touch-ups.
- To protect the design and improve durability, apply a clear sealant or polyurethane over the painted tiles according to the manufacturer's instructions. This will help protect the paint from wear and tear.

Remember to take your time and be patient throughout the process to achieve the best results. Stenciling can be a bit time-consuming, but the end result can be a beautiful and customized tile floor.