Pickleball Court Stencil Set
Pickleball, the racquet game taking the US by storm, is perfect for beginners and experienced players alike! With its fast-paced action and endless fun, this sport has something for everyone, no matter their age or athletic ability.
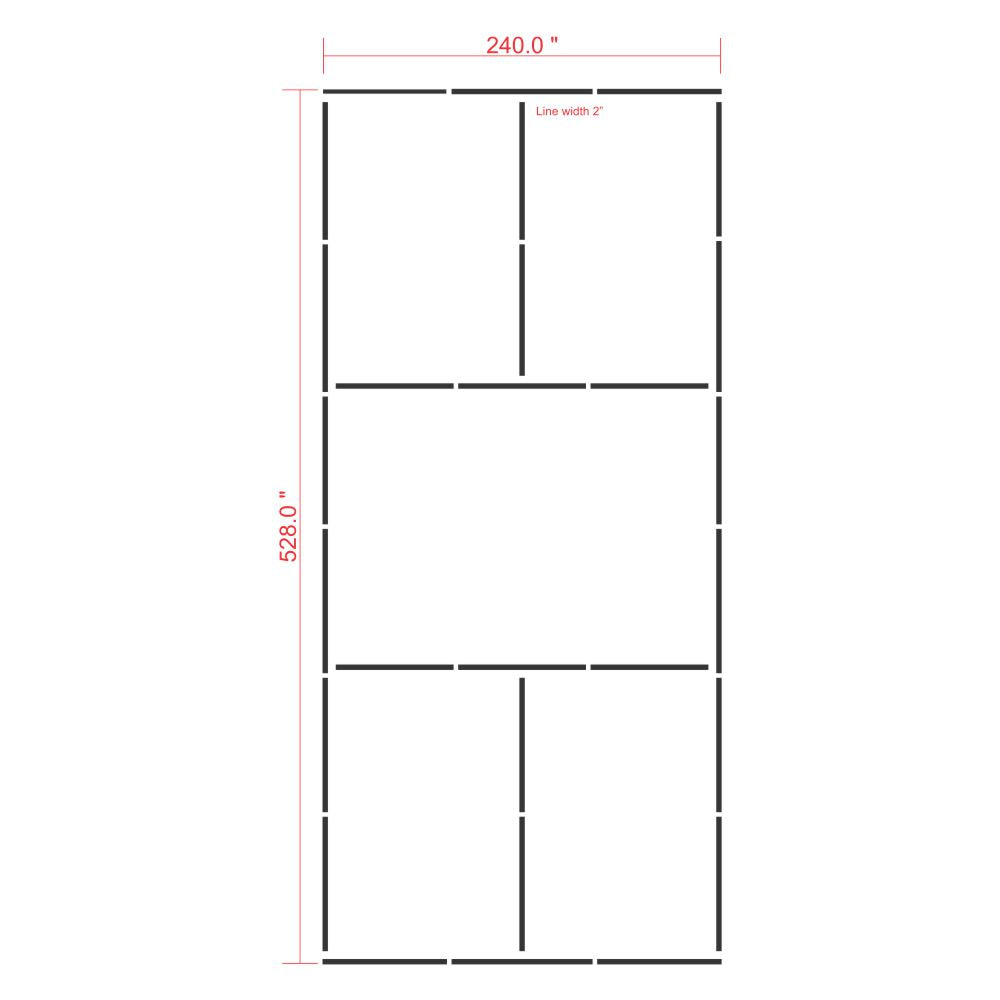
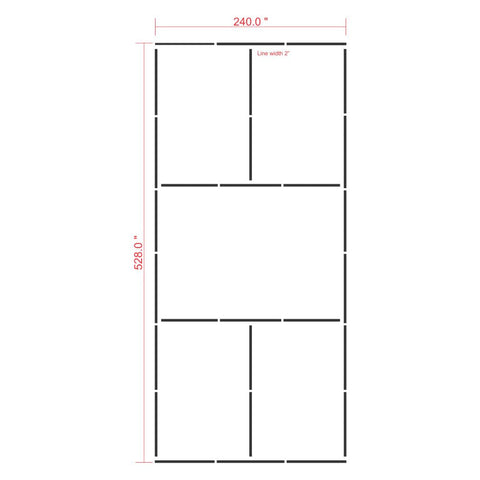
With the 14-piece stencil set, creating your own official pickleball court is a breeze! Simply locate a 44x20 ft hard surface, add a net line, and follow the stencils for a flawless, square court. In just an hour, you'll have a full court ready for play!
Crafted from 1/16th inch plastic, these stencils are a breeze to use for sprays or brushes. The material is both resilient and pliable, ensuring hundreds of uses. This versatile stencil can cover multiple courts and last for years. It's incredibly durable and can even be rolled up without losing its flatness.
Maintain the stencil's quality by cleaning off any excess paint after use, as build-up may cause it to curl. Refresh the paint when it starts to weather or share it with a friend for their own court. It's always ready to be used again!
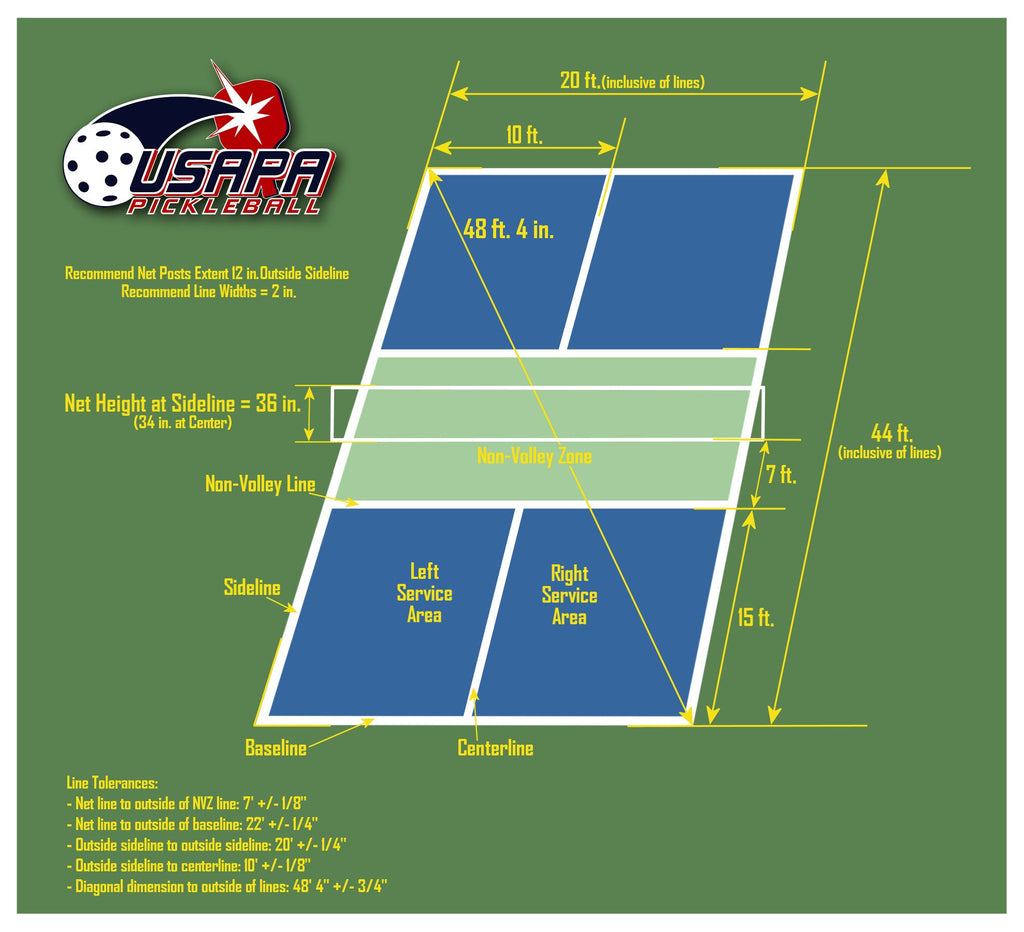
See rules and court setup of Pickleball please go to the USAPA website.
Pickleball Court Painting Instructions:
- Looking to minimize the sun's impact? Try laying out the court on a North-South azimuth.
- Prepare the surface of the court by cleaning your surface and filling any cracks.
- For proper placement, draw a line in the center of your designated space and fill it in with chalk.
- Lay out the stencil for 1 half-court start with 1L and 1R with the edge of the short leg of this L shaped stencil against the center of the net line. Adjust and center the space between 1L and 1R so that stencils 2L, 2R, two of stencil 3, and stencil 4 fit across the Non-Volley line as shown in our diagram.
- When using the Pickleball Court Stencil Set, make sure to adjust the stencils accordingly and ensure that the lines are straight and the stencils fit neatly end to end. This will help create a clean and professional-looking court.
- After setting the stencil, use tape or bricks to protect against potential displacement from accidental movement.
- If you are using a specific color for the interior of the court, blue is a popular choice. It's recommended to roll the area between the net and Non-volley line as it's a larger space. Be sure to mark or tape the outside of the stencils for easy relocation, paying special attention to the corners. Once the stencil is removed, roll between the lines. You don't need to worry about being precise with the edges as they will be covered with the line paint.
- Once the interior is dry, reposition the stencil and repeat steps 4 and 5, following the marks from step 6.
- For a more defined line, use either spray paint or a dry brush to fill in the stencils. This will help prevent paint from bleeding underneath the stencil. Repeat the process if needed.
- Easily establish the sides and fill in any gaps with our durable stencils. Just place one stencil and use spray or a small brush for a perfect finish.
- After the paint is dry remove the stencils. Repeat for the other half of the court.
- Once you're done, be sure to clean and store the stencils for future use.