


How to Stencil on Fabric
At Oak Lane Studio, we believe you can stencil just about anything, including fabric. Whether you want to upcycle a well loved, upholstered chair, paint a fun design on a lampshade, pillow, tablecloth, napkins, placemats or curtains, fabric stenciling is a fantastic way of adding a personal, unique, and hand made touch to your home décor.
In this How to Stencil tutorial, we will walk you through various home décor fabric stenciling projects. We will share general how to stencil on fabric techniques, including what paint to use for fabric stenciling, how to avoid paint bleed while stenciling, how to keep the fabric stationary as you stencil and how to stencil allover, repeating patterns. For this post, we have taken examples a variety of DIY home décor fabric stenciling projects, including tablecloth stenciling, curtain stenciling, pillow stenciling, lampshade stenciling and laundry bag stenciling.
Supplies for Stenciling Fabric:
- Home Décor Stencil Template
- Repositionable Spray Adhesive
- Stencil Brush
- High Density Foam Roller*
- Fabric Painting Medium
- Americana Acrylic Paint
- Frog Painter's Tape**
- Cardboard
- A ruler (for some projects)
Prepare the Fabric for Stenciling
How you prepare your fabric for stenciling will depend on the stenciling project and the type of fabric you are using. If you are stenciling any fabric you intend to wash in the future (such as t-shirts, tote bags, etc.) wash and dry the fabric at least once before you stencil it. You do not want your newly stenciled t-shirt or tote bag to shrink in its first wash.
Whether or not you want to wash the fabric first, it is important to ensure the fabric is clean and wrinkle free before you stencil. You should only stencil on a smooth surface because any bumps or wrinkles are places paint can collect or slip beneath the stencil template and mar the stenciled design. If the fabric is wrinkled, iron or steam out the wrinkles first.
Dust and dirt will prevent the stencil template and the Frog Painter's Tape from adhering to the fabric. Whether you are stenciling a lampshade, curtains, pillows or bags, run a lint roller or some masking tape over the fabric before you stencil.
If you are stenciling a lampshade you don't need to secure your fabric to a piece of cardboard. If you are curious about how to stencil a lampshade, please check out our tutorials: How to Stencil a Lampshade Tutorial.
Secure the Fabric to Cardboard
Begin by securing your fabric to a piece of cardboard. This is essential, as you will need a flat and even surface to paint on. Not all fabric needs a cardboard base, such as stenciling projects on lampshades or stuffed pillows.


To secure your fabric, spray one side of your cardboard with Repositionable Adhesive Spray, then wait 30-60 seconds before draping your fabric flat over the cardboard. It is important to wait 30-60 seconds before placing your fabric on the tacky cardboard or the cardboard may be difficult to remove later, our adhesive spray is strong stuff. Gently press and smooth the fabric over the cardboard to create a flat and even surface for stenciling. Any bumps in the fabric will distort the final stenciled design, so try to make your surface as smooth as possible.

If you are stenciling a bag or a t-shirt, place the sticky cardboard inside the bag or t-shirt and smooth the top of the bag or t-shirt over the cardboard. You may need to weigh down the corners or the straps with books or paperweights to keep the edges of the bag from curling up.

If you are stenciling a bag, a curtain, duvet cover, T-shirt, etc. we highly recommend using a cardboard base to hold your fabric in place while you stencil.
Measure and Plan your Stencil Project
If you are stenciling a large project, such as a curtain, shower curtain, duvet cover or table cloth, you will need to reposition the stencil template as you stencil across the fabric. Before you begin stenciling, plan out your stenciling path across your fabric, up, down, left to right, etc.

(You can see pieces of green tape on the stenciled curtain where we painted the Registration Marks).
As you stencil and reposition the stencil template across the fabric, place small pieces of Frog Painter's Tape underneath the four, triangular Registration Marks in the corners of the stencil template and stencil the marks onto the Frog Tape. These markings will be you guide to precisely align the stencil template with the previously stenciled patterns. See our other blog post for more detailed instructions on how to stencil allover, repeating patterns.
If you are stenciling in the center of the fabric, first find the midpoint of the fabric or where you want to position you stencil. You don't have to measure, but measuring can help to prevent "human error" when centering your stencil pattern on the fabric.
(You can see where we marked the midpoint with a small piece of tape, and our outline of where we will stencil).
To find the center of the fabric, use a ruler or measuring tape along the top of the fabric to find the midpoint and position a sheet of paper below this center point. The paper represents where you will paint the stencil. If your bag or t-shirt is particularly wide, you can measure the space between the bag handles/t-shirt sleeves. Your objective here is to align your sheet of paper so that it is centered in the bag with the equal space between the paper and the left and right ends of your fabric.
Stenciling Tip: run two straight lines of frog tape from the t-shirt sleeves or bag handles to the bottom of your fabric. These are good reference points to check that your stencil is centered and straight.
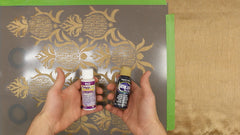
Mix Fabric and Acrylic Paints for Fabric Stenciling
To stencil on fabric, you will need a paint that works on fabric. We recommend a mix of Fabric Painting Medium with acrylic paint (we use Americana Acrylic Paint), but you can also find fabric paint options at your local paint store.
If you are mixing paints: The ratio of acrylic paint to Fabric Painting Medium is roughly 2:1, 2 parts acrylic paint to 1 part Fabric Painting Medium (however much acrylic paint you use, mix in half that amount of Fabric Painting Medium). The ratio doesn't need to be exact, you can make a rough estimation as you pour the paint. Mix the two paints together on a paper plate.
The fabric paint medium and acrylic paints that you chose do not have to be the same color. You can use different colors of paint to create any color or shade you prefer. For example, mixing any color with white paint will lighten and soften the final shade of the paint. If you can't match your fabric paint medium color and acrylic paint color exactly, don't worry! Find two colors that will create a pleasing blend color when mixed.
Position the Stencil Template on the Fabric
First, spray the back of the stencil template with our Repositionable Spray Adhesive. It is best to do this away from your stenciling project, as you don’t want the spray adhesive to also get on the fabric you will stencil.

Again, wait 30-60 seconds after spraying before you position the stencil template on the fabric. Once the stencil is in place, press down on the design edges to make sure that the whole stencil is flat and smooth. Any bumps can cause a disruption in the final stenciled pattern.

If you are stenciling a repeating pattern (for example, stenciling an entire curtain), place four small pieces of Frog Painter's Tape underneath the triangular registration marks in the corners of the stencil. The marks you stencil onto the painter's tape will guide you later to precisely align the stencil template with previously stenciled sections. See our other blog post for more detailed instructions on how to stencil allover, repeating patterns.

Tape around the stencil edges, this will help you avoid any accidental paint smudges outside the stencil design and create a clean finish.
Stencil Fabric with the Dry Brush Technique
Now the paint is mixed, it is time to stencil!
Stenciling is not painting and the key difference is that amount of paint you use to stencil. Your brush or roller should be almost dry to the touch when you stencil, otherwise excess paint will seep under the stencil and cause paint bleed.
If you are stenciling with a roller, begin by rolling your paint roller in the paint, and then roll out as much excess paint as you can onto the paint tray or a piece of cardboard. To check that you have the right amount of paint for stenciling, press your finger into the paint roller. If paint wells up around your finger you have too much paint to stencil, continue rolling paint onto the painter’s tray.

If you are stenciling with a paint brush, the Dot Test is a good way to see if you have to right amount of paint for stenciling.
The Dot Test for Stenciling:How to check that you have the right amount of paint to stencil with a paint brush. |
|
Once you have a dry brush or roller you are ready to stencil! Begin stenciling by swirling, stippling or rolling paint into the stencil template design. If the color is very faint at first, resist the urge to add more paint to your brush or roller. As you stencil more layers of paint color will gradually build up. Stenciling on fabric often requires more layers of paint than other stenciling projects, 5 to 6 coats of paint is normal, but you may need more or less depending on the colors of paint you chose and the saturation you are hoping to achieve.

The gradual accumulation of color gives you the opportunity to personalize your home décor. If you are envisioning a very bright burst of color, stencil more layers of paint. If you prefer a subtle, rustic or farmhouse style, stencil fewer layers of paint. If you are fond of a weathered look on home décor, after the paint has dried, sand some paint off with a light sandpaper.
Remove and Clean the Stencil Template
When you have finished stenciling, wait for the paint to dry complete and then carefully peel the stencil template and the Frog Painter's Tape off the fabric. If you are stenciling many repeats of the same stencil pattern, see our post on How to Stencil Allover Repeating Patterns for instructions on how to reposition a stencil template and repeat a stencil design.
Our home décor stencil templates are washable and re-usable. When you have finished stenciling, clean the stencil template and then store it away for future DIY home improvement stenciling projects.
Acrylic Paint and Fabric Painting Medium are both water based paints and very easy to clean off of a stencil template. To clean the stencil template, first soak it in hot water for five minutes, this will loosen any paint that has dried on the stencil. Then wipe away all the remaining paint with a cloth and store the stencil for future DIY stenciling projects.
For more information on how to clean stencil templates, please see our FAQ page.
A note about our Stencil Supplies:
*If you are stenciling with a paint roller we strongly recommend using a High Density Foam Roller. As we explained in our post "How to Stencil without Paint Bleed", the key to stenciling is applying paint in many thin layers. Stenciling with too much paint will cause paint to bleed under the stencil template and blur the stenciled design. High Density Foam Rollers absorb less paint than regular paint rollers and are better for stenciling.
**We prefer Frog Painter's Tape because it is more effective than other painter's tape. Frog Painter's tape does not leave a residue when removed and does not take off underlying paint when you peel it off.
Should I Stencil with a Brush or a Roller?
You can stencil with either a stencil brush or a paint roller, but different stenciling projects are easier with one or the other. If you are stenciling a smaller stencil, or only a single repeat of an stencil template, we recommend stenciling with a stencil brush. If you are stenciling a pillowcase, a lampshade, a bag, t-shirt, or any other smaller DIY stenciling project, a stenciling brush is best.
If you are stenciling a larger project, such as curtains, or a tablecloth, or are using a stencil with large openings we recommend stenciling with a high density foam roller. A paint roller will spread paint over a larger area faster than a stencil brush. A stencil brush is more precise than a foam roller and is best for stencil templates that feature many small details, or stenciling in small, tight corners.