


How to Stencil Curtains
In this DIY how to stencil tutorial we will walk you through how to stencil fabric curtains. We will cover basic how to stencil techniques, such as the Dry Brush Technique, as well as tips for how to stencil on fabric and how to stencil repeating patterns. See our tutorial on stenciling repeating patterns for more instructions on how to stencil allover, repeating patterns.
For this project we used our Antique Pineapple wall stencil template in an allover, repeating pattern, but you could also stencil a border around the edge of the curtains for a simpler décor accent.
Supplies for Stenciling Curtains
- Pineapple Wall Stencil
- or another Wall Stencil Template
- Repositionable Spray Adhesive
- High Density Foam Roller*
- Americana Acrylic Paint
- Fabric Painting Medium
- Frog Painters Tape
Practice Stenciling First
We always recommend practicing your stenciling technique on a piece of cardboard or fabric before beginning your stenciling project, especially if this your first time stenciling. The Dry Brush Technique, or stenciling with a bare minimum of paint (explained in Step 4) is key to stenciling, as stenciling with too much paint will cause paint to seep under the stencil and blur the design (this is also known as "Paint Bleed"). To stencil, you will swirl, stipple or roll many faint layers of paint until the color has gradually reached the shade you prefer. Practice your stenciling technique first to get a feel for how little paint you actually need for stenciling.
How to Prepare Curtains for Stenciling
No matter what project you are stenciling, it is important to always stencil on a smooth, stationary surface. (It would actually be very difficult to stencil on an uneven and unsteady surface).

(Although the above picture primarily illustrates Step 2: Spraying the Stencil, you can see we have placed a large piece of cardboard on top of the table).
When stenciling fabric, the first step is to secure the fabric to a hard surface, such as a piece of cardboard or wood, to hold the fabric in place while you stencil. To secure the fabric, spray the back of the curtain (whichever side you will not stencil) with our Repositionable Spray Adhesive. Hold the spray can 6 to 8 inches away from the fabric to spray, and keep you mouth closed while spraying. Wait 30-60 seconds after spraying the curtain before you position it on the cardboard. Our adhesive spray is very strong, and if you don't wait at least 30 seconds you may have trouble removing the curtain from the cardboard after you finish stenciling.

(Above we are smoothing the curtain over a large piece of cardboard that rests on top of a table).
Smooth the curtain fabric over the cardboard until there are no bumps or wrinkles. Then use a lint roller or some tape to remove dust and dirt from the fabric, as dust will keep the stencil template from sticking to the fabric. If you curtains are very dirty, you might consider washing and ironing them before stenciling.
How to Position a Stencil Template on a Curtain

Spray the back of the stencil template with Repositionable Spray Adhesive, just as you sprayed the curtain. Again, wait 30 to 60 seconds before placing the stencil template on the top corner of the curtain.

Place small pieces of Frog Painter's Tape underneath the registration marks (the triangular cutouts in the corners of the stencil template). You will use these triangular markings to record the precise location of the stencil template in the spot you are about to stencil. When you reposition the stencil later, the registration marks that you stenciled onto the four piece of Frog Painter's tape will guide you as you realign the stencil template to repeat the stencil pattern all over the curtain.

(Above you can see the green tape along the stenciled curtain that mark previous stencil positions and are used to precisely align the stencil template with previously stenciled patterns for seamless allover stenciling).
Firmly press the stencil into the fabric, make sure that the none of the cut out edges are sticking up and that the stencil lays flat on the curtain. Tape around the outer edges of the stencil with Frog Painter's Tape (this is the gentlest painter's tape and least likely to remove paint when you peel it off).
How to Mix Fabric Painting Medium with Acrylic Paint
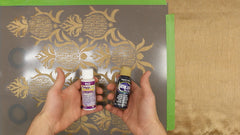
To stencil on fabric, you will need to mix Fabric Painting Medium with acrylic paint (we use Americana Acrylic Paint). The ratio is roughly 2 parts acrylic paint to 1 part Fabric Painting Medium (however much acrylic paint you use, mix in half that amount of Fabric Painting Medium). The ratio doesn't need to be exact, you can make a rough estimation as you pour the paint. Mix the two paints together on a paper plate.
How to Stencil Curtains with the Dry Brush Technique
Now the paint is mixed, it is time to stencil!
Stenciling is not painting and the key difference is that amount of paint you use to stencil. Your brush or roller should be almost dry to the touch when you stencil, otherwise excess paint will seep under the stencil and cause paint bleed.

If you are stenciling with a roller, begin by rolling your paint roller in the paint, and then roll out as much excess paint as you can onto the paint tray or a piece of cardboard. To check that you have the right amount of paint for stenciling, press your finger into the paint roller. If paint wells up around your finger you have too much paint to stencil, continue rolling paint onto the painter’s tray.

If you are stenciling with a paint brush, the Dot Test is a good way to see if you have to right amount of paint for stenciling.
The Dot Test for Stenciling:How to check that you have the right amount of paint to stencil with a paint brush. |
|
With your dry brush or roller, begin stenciling by rolling paint over the stencil design or, if you are stenciling with a paint brush, swirl or stipple paint onto the stencil template (do not stencil in brush strokes).

Even though the first layer of paint will be very faint, resist the urge to add more paint to your brush or roller until necessary. Color will gradually build in many thin coats of paint. For fabric stenciling, 5-6 layers of paint is normal. You may need to use the slightest pressure as you roll paint through your stencil, but do not press too hard or else you risk forcing paint beneath the edges of your stencil (this is paint bleed). Of course, if the paint does bleed, if you are hanging the curtains in a ruffled manner nobody will notice!

One of the benefits of stenciling is how much you can personalize your home décor. If you are envisioning vibrantly colored curtains that pop, add a few more layers of paint until you achieve the saturation you hoped for. If you prefer a subtle, distressed style for farmhouse style décor, stencil fewer layers of paint.
How to Reposition the Stencil Template
Once you completely fill in your stencil, paint the triangular registration marks onto the frog tape beneath the registration marks. Then, gently peel up the tape around the stencil edges (not the registration marks tape) and the stencil template. You will not need to respray the stencil every time you reposition it. If the stencil loses some of its stickiness, try wiping the back (sticky side) with a slightly damp cloth to remove dust and dirt. If the stencil still does not stick, respray the back.

(You can see the green pieces of Frog Tape where we stenciled the registration marks).
To reposition the stencil template, line the top two registration marks on the stencil template with the previously stenciled bottom two registration marks. As you reposition and paint your stencil template, be sure to always put tape beneath the registration marks so that the stenciled design is level and even across the curtain. Continue to stencil with the dry brush technique until you have stenciled the entire curtain.

How to Clean the Stencil Template
When the paint color has reached your desired saturation and the paint has dried, gently remove the Frog Painter's Tape and the stencil template. Our stencil templates are easily washable and reusable! For this stenciling project, we stenciled with water based paint which is exceptionally easy to clean. To clean the stencil template, first soak it in hot water for five minutes, this will loosen any paint that has dried on the stencil. Then wipe away all the remaining paint with a cloth and store the stencil for future DIY stenciling projects.
For more information on how to clean stencil templates, please see our FAQ page.
Go hang up your stenciled curtains and enjoy your hand painted home!
Curtain stenciling is a very exciting DIY home décor stenciling project, and much easier than you might expect. Whether you are doing a complete DIY room makeover, or just sprucing up a dull room, stenciled curtains add personality and style to otherwise bland spaces. You can stencil living room curtains, bedroom curtains, or even shower curtains (check out Debbie Westbrook of Refresh Style's shower curtain stenciling tutorial where she used our Jaipur Damask wall stencil template).
Stenciled curtains are an incredibly elegant DIY home improvement project, and instantly bestow a touch of playful whimsy, classic elegance, or rustic texture to your room. Stencils are an easy, budget-friendly DIY home decorating tool that help you handmake whatever atmosphere you hope to create in your home. Not to mention, stenciling is loads of fun!
We offer a large selection of Americana Acrylic Paints (best for stenciling) and beautiful home décor stencils in myriad styles, from rustic farmhouse stencils, to victorian damask stencils, and modern, geometric stencil templates, so you can find the perfect personal touches for your home.
Find more helpful How to Stencil Tutorials on our Stenciling Blog.
* A note on our supplies: If you are stenciling with a painter roller we strongly recommend using a High Density Foam Roller. As we explained in our post "How to Stencil without Paint Bleed", the key to stenciling applying paint in many thin layers. Stenciling with too much paint will cause paint to bleed under the stencil template and blur the stenciled design. High Density Foam Rollers absorb less paint than regular paint rollers and are better for stenciling.